


Cisco Routers are powerful and widely trusted network devices in businesses and organizations due to their stability and high customizability. However, configuring this device can be a challenge for beginners. In this article, Genfamer will guide you on how to configure a router Cisco basically in detail, from basic commands to optimization steps, helping you build an effective and reliable network system.
Components of Router Configuration

A router is a crucial network device that helps connect different networks and route data between them. Router configuration consists of many components, each performing a specific role to ensure the efficient operation of the network system. Below are the main components in router configuration and their detailed descriptions:
- Interface: An interface is the physical connection point between the router and other network devices such as computers, switches, or modems. Common interface types:
- Ethernet: Connects to a LAN.
- Serial: Connects to a WAN (like a leased-line).
- Wireless: Wireless connection.
- Each interface can be configured with an IP address for identification within the network.
- IP Address and Subnet Mask: The IP address identifies the router in the network, allowing it to communicate with other devices. A subnet mask is used to divide a large network into smaller subnets, helping to manage IP addresses effectively.
- Routing Table: The routing table stores information about the network routes that the router knows. There are two main types of routing:
- Static Routing: Routes are manually configured.
- Dynamic Routing: Routing protocols such as OSPF, EIGRP, or RIP automatically update the routing table.
- Routing Protocol: Routing protocols help the router find the best path to transmit data:
- RIP (Routing Information Protocol): Simple, suitable for small networks.
- OSPF (Open Shortest Path First): Used in large networks, highly efficient.
- EIGRP (Enhanced Interior Gateway Routing Protocol): Integrates powerful features for enterprise networks.
- Security:
- Access Control List (ACL): Filters network traffic, preventing unauthorized access.
- Firewall: Integrated on some routers to protect the network from external attacks.
- VPN (Virtual Private Network): Ensures data transmitted over the network is secure and encrypted.
- Network Address Translation (NAT): NAT allows multiple devices in a local network to use a single public IP address to access the Internet. NAT configuration is commonly used in businesses or homes.
- DHCP (Dynamic Host Configuration Protocol) Service: A router can automatically assign IP addresses to devices in the network through the DHCP service.
Router configuration is a crucial part of ensuring a stable and efficient network system. Understanding each component in router configuration helps network administrators optimize performance and security for the system.
Connecting to configure the router via the console port

Connecting and configuring a router via the console port is one of the basic and important methods for managing and adjusting network devices. This method is often used for initial setup or troubleshooting when remote access protocols like SSH or Telnet are unavailable. Here is a detailed guide to connecting and configuring a router via the console port.
- Prepare necessary equipment and tools: Before starting, you need to prepare the following equipment and tools:
- Router: The device to be configured.
- Console cable: Usually an RJ45-to-DB9 cable or a USB-to-RJ45 cable (depending on the router model).
- Computer or laptop: With a suitable connection port (COM port or USB port).
- Terminal software: Some popular software includes PuTTY, Tera Term, or the built-in applications on macOS and Linux (Terminal).
- Hardware Connection:
- Connect one end of the console cable to the console port on the router.
- Connect the other end of the cable to the computer. If using a USB-to-RJ45 cable, you will need to install drivers for the computer to recognize the connection port.
- Identify the COM port on the computer:
- On Windows: Open Device Manager to check which COM port is assigned to the console cable.
- On macOS and Linux: Use the command `ls /dev/` to identify the port (usually `/dev/ttyUSB0` or similar).
- Configure the terminal software: Open the terminal software and follow these steps:
- Select the connection protocol as Serial.
- Enter the corresponding COM port identified in the previous step.
- Configure the connection parameters:
- Baud rate: 9600
- Data bits: 8
- Parity: None
- Stop bits: 1
- Flow control: None
- Access the Command Line Interface (CLI): After a successful connection, you will see the router’s command line interface. If not, press the Enter key a few times. If the router prompts for a username and password, provide the corresponding information.
- Configure the router: Once you have access to the CLI, you can execute configuration commands such as:
- Setting IP addresses for ports.
- Configuring routing protocols.
- Setting passwords and security.
- Saving the configuration using the `copy running-config startup-config` command to prevent losing the configuration upon restart.
- End the session: When finished with the configuration, type the `exit` command to leave the CLI. Disconnect the console cable and make sure to save the configuration you have made.
Using the console port to configure a router not only gives you direct access to the device but also ensures you can make necessary adjustments even in the most complex situations.
Cisco Router Configuration Modes

Cisco routers provide several different router configuration modes to manage, operate, and optimize the device. Each mode has its own role and function, from device monitoring to detailed configuration of each interface or network protocol. Below are the important router configuration modes along with detailed descriptions.
- User EXEC Mode: User EXEC Mode is the first mode you will access after connecting to the router. This is the mode with the lowest privilege level, mainly used for monitoring and checking the device.
- Privileged EXEC Mode: Privileged EXEC Mode is a mode with higher privileges, allowing you to execute advanced check commands and access other configuration modes.
- Global Configuration Mode: Global Configuration Mode is the mode that allows router configuration for the entire router system. From here, you can access other sub-configuration modes such as interface or routing.
- Interface Configuration Mode: Interface Configuration Mode focuses on configuring parameters for each network interface on the router, such as Ethernet or Serial ports.
- Router Configuration Mode: Router Configuration Mode is a mode dedicated to configuring routing protocols on a Cisco router, such as RIP, OSPF, or EIGRP.
- Line Configuration Mode: This mode is used to configure access lines (console or vty) to control remote or direct access to the router.
Understanding the Cisco router configuration modes is an important step for you to manage the device effectively. Practice regularly to become familiar with each mode and use them flexibly.
Basic Router Configurations
When starting to work with a Cisco router, performing basic configurations is an important step to ensure the device operates correctly and efficiently. These are the necessary steps for a network administrator to prepare the router for a production environment. Below is a detailed guide to the basic steps of configuring a Cisco router.
Naming the router

Naming the router is a crucial step in the basic configuration process, helping administrators easily identify the device in the network system, especially when managing multiple routers. The router’s name not only reflects the device’s role but also helps optimize the monitoring and administration process. To name the router, you need to access the global configuration mode and use the `hostname` command.
- Log in to the router and switch to privileged mode:
- Router>enable
- Router#
- Access global configuration mode with the command:
- Router#configure terminal
- Router(config)#
- Use the `hostname [router_name]` command to set a new name for the router:
- Router(config)#hostname MyRouter
- MyRouter(config)#
After execution, the router’s name will be displayed at the command prompt, replacing the initial default name. This helps administrators easily identify the device, especially in remote connection sessions or in complex network environments.
Configure against command line scrolling

Configuring against command line scrolling is an important step when working with a router, helping administrators avoid interruptions when entering commands due to system messages appearing. On Cisco network devices, messages such as interface status or error warnings can appear at any time, interrupting and pushing the command cursor down, causing inconvenience for the user.
- Access global configuration mode:
- Router>enable
- Router#configure terminal
- Router(config)#
- Access console line configuration mode:
- Router(config)#line console 0
- Router(config-line)#
- Enable the anti-scrolling feature with the command: Router(config-line)#logging synchronous
- Exit console line configuration mode:
- Router(config-line)#exit
- Router(config)#
After this router configuration, you can enter commands without being interrupted by system messages. This is a simple router configuration but it provides great convenience, especially when working in an environment with many notifications or managing devices remotely.
Password Configuration

Password configuration is an important step to protect access to the router, ensuring the network system’s safety against unauthorized access risks. On a Cisco router, passwords can be configured for various levels and access methods, including Privileged EXEC mode, console connection, and remote connection via VTY lines (Telnet or SSH).
- Set a password for privileged mode (enable password):
- Router>enable
- Router#configure terminal
- Router(config)#enable secret [password]
- Set a password for the console connection:
- Router(config)#line console 0
- Router(config-line)#password [password]
- Router(config-line)#login
- Set a password for remote connections (VTY):
- Router(config)#line vty 0 4
- Router(config-line)#password [password]
- Router(config-line)#login
Proper password configuration helps ensure that only authorized individuals can access and manage the router, minimizing the risk of unauthorized intrusion into the network system. Regularly changing passwords and using strong passwords are also good practices to enhance security.
Create Login banner/Motd banner

A Login banner (or MOTD banner – Message of the Day) is a message that displays whenever a user logs into the router. It can be used to display important information, warnings about unauthorized access, or notifications about device usage policies. To create a banner for a Cisco router, you need to access the global configuration mode and use the `banner motd` command.
- Access global configuration mode:
- Router>enable
- Router#configure terminal
- Router(config)#
- Create MOTD banner: Router(config)#banner motd #Unauthorized Access is Prohibited!#
- Save the configuration: Router#copy running-config startup-config
After configuration, when a user logs into the router, the MOTD banner will display the warning message or information you have configured. This helps protect the router from unauthorized access and reminds users of device usage policies.
Show router Interface names information

Displaying information about interface names helps identify which interfaces are active, which are not configured, and their status. To display detailed information about the interfaces on a Cisco router, you can use the `show ip interface brief` command. This command provides a quick summary of all network interfaces on the router.
- Log in to the router and switch to privileged EXEC mode:
- Router>enable
- Router#
- Use the `show ip interface brief` command to display information about all interfaces: Router#show ip interface brief
The `show ip interface brief` command is one of the basic and frequently used commands in network administration, helping you easily monitor and troubleshoot issues related to the network interfaces on the router. This is useful information that helps you manage and check the status of the network interfaces on the router.
Moving between Interfaces

Each interface on a router can have separate configurations, and you need to access the configuration mode of each interface to make changes such as configuring an IP address, enabling/disabling the interface, or changing other parameters. To move between interfaces on a Cisco router, you must enter the interface configuration mode for each port.
- Access global configuration mode:
- Router>enable
- Router#
- Router#configure terminal
- Router(config)#
- Move to the interface to be configured: To configure a specific interface, you use the `interface [interface_name]` command to enter its configuration mode. For example:
- Router(config)#interface GigabitEthernet0/0
- Router(config-if)#
- Configure the interface: After entering a specific interface, you can configure the IP address, enable/disable the interface, or make other changes.
- Router(config-if)#ip address 192.168.1.1 255.255.255.0
- Router(config-if)#no shutdown
- Move to another interface: To move between different interfaces, you just need to exit the current interface configuration mode and enter the configuration mode of another interface using the `interface [interface_name]` command.
- Router(config-if)#exit
- Router(config)#
- Router(config)#interface GigabitEthernet0/1
- Router(config-if)#
Ensure that after completing the configuration of one interface, you exit its configuration mode so that you can continue working with other interfaces or perform other operations on the router.
Configure Interface port IP

Configuring an IP address for the interfaces on a router is an important part of setting up a network, allowing the router to communicate with other devices within the network or between different networks. The IP address configuration for an interface will depend on the network requirements of the organization or the network structure you are setting up.
- Access privileged mode:
- Router>enable
- Router#
- Access global configuration mode:
- Router#configure terminal
- Router(config)#
- Move to the interface to be configured: Use the `interface [interface_name]` command to enter the configuration mode for a specific interface.
- Router(config)#interface GigabitEthernet0/0
- Router(config-if)#
- Configure the IP address and subnet mask for the interface: Use the `ip address` command to configure the IP address and subnet mask for that interface. Example: Router(config-if)#ip address
- Enable the interface (if needed): After configuring the IP address, you need to ensure the interface is enabled with the command Router(config-if)#no shutdown.
- Save the configuration: Router#copy running-config startup-config
After performing the steps above, the GigabitEthernet0/0 interface port will have the IP address 192.168.1.1 and will be able to communicate with other devices in the 192.168.1.0/24 network. Configuring IP addresses for interfaces is an essential part of establishing effective network connectivity and routing on a Cisco router.
Configure Clock Time Zone

Configuring the clock time zone on a router helps ensure that all system events such as logins, configuration changes, and log messages are recorded with the correct time. Correctly configuring the time zone not only makes it easier to identify and track events on the router but also ensures time synchronization throughout the network system, especially when multiple devices need to link and work together.
- Access privileged mode:
- Router>enable
- Router#
- Access global configuration mode:
- Router#configure terminal
- Router(config)#
- Configure the time zone:
- Use the command `clock timezone [timezone_name] [offset_hours]`.
- Example: Router(config)#clock timezone ICT 7
- Verify the configuration: use the command Router#show clock
After performing the steps above, your router will have the correct time zone and be synchronized with the system time. Configuring the correct time zone is very important to ensure all devices in the network can operate correctly and to easily track time-related events.
Assign a hostname to an IP address

A hostname is a unique name assigned to a device in a network, and it helps distinguish devices from each other without having to remember the IP address of each device. When a hostname is configured on a router or switch, it will be displayed on the command line and help administrators easily identify the device when managing or configuring the system.
- Access privileged EXEC mode:
- Router>enable
- Router#
- Access global configuration mode:
- Router#configure terminal
- Router(config)#
- Assign a hostname to the router: To assign a hostname, you use the `hostname [new_name]` command. For example: Router(config)#hostname Router1
- Verify the hostname: Router1#show running-config | include hostname
Assigning a hostname makes it easier for you to identify devices when working in a complex network environment. Especially when multiple devices use the same IP addresses, a hostname will make configuring and managing the devices more intuitive and efficient.
Configure no hostname resolution

In a computer network, resolving a hostname to an IP address is a crucial function that allows devices to communicate with each other by name instead of having to remember IP addresses. However, in some situations, you may want to disable hostname resolution, which prevents the router or network device from wasting time querying DNS (Domain Name System) to look up IP addresses for non-existent names.
- Access privileged mode
- Access global configuration mode
- Disable hostname resolution: To disable hostname resolution, you use the `no ip domain-lookup` command. For example: Router(config)#no ip domain-lookup
- Save the configuration: Router#copy running-config startup-config
After this configuration, if you enter a non-existent name in the CLI (Command Line Interface), for example `Router1`, instead of the router trying to perform a DNS lookup, you will receive an error message immediately without a resolution delay. Disabling hostname resolution will help minimize latency when working on routers or switches, especially when you are entering commands unrelated to hostnames.
Configure timeout duration

The timeout duration is the period a connection or session will be maintained on a network device before it automatically closes or expires. Configuring the timeout is very important for managing connections and security on a router, especially in multi-user network environments. Setting a reasonable timeout helps minimize unnecessary resource usage on the device and protects it from insecure connections. Here are the steps to do it:
- Access privileged EXEC mode
- Access global configuration mode
- To configure the timeout for EXEC mode, you use the `exec-timeout` command in the following format:
- Router(config)#exec-timeout [minutes] [seconds]
- Configure the timeout for vty connections (Telnet/SSH):
- Router(config)#line vty 0 4
- Router(config-line)#exec-timeout 10 0
- Proceed to save the configuration
Configuring the timeout duration is an important part of managing sessions on network devices. Using a reasonable timeout helps ensure security and save system resources, while also preventing unnecessary connections from being held open for too long on network devices.
Save the running configuration file

In Cisco routers, the running configuration is the current configuration that the device is using, but it only exists in RAM and will be lost if the device is rebooted. Therefore, to ensure that changes are maintained after a reboot, you need to save the running configuration to the startup configuration.
- Access privileged EXEC mode
- To save the running configuration to the startup memory, use the `copy running-config startup-config` command. Router#copy running-config startup-config
- After entering the above command, the system will ask you to confirm the names of the source and destination for the copy. Usually, you just need to press “Enter” to accept the defaults (running-config and startup-config). The copying process will take place and a “Building configuration…” message will appear when the copy is complete.
- After saving, you can verify the saved configuration with the show startup-config command. This command displays the configuration saved in NVRAM, which is the configuration that will be applied when the device is rebooted.
Saving the running configuration is an essential step in managing network devices, ensuring that all changes you make will not be lost when the device reboots.
Delete the startup configuration file

The startup configuration file (startup-config) is the file that stores the current configuration of the device in NVRAM. When a router or switch reboots, it loads this configuration from NVRAM into RAM and applies it for working sessions. When you delete the startup configuration file, the device will no longer retain any previous configurations, and when the device is rebooted, it will enter the initial configuration mode (no configuration), requiring you to reconfigure the device from scratch.
- Access privileged EXEC mode
- To delete the startup configuration file, you use the `erase startup-config` or `delete startup-config` command. For example: Router#erase startup-config
- After executing this command, the system will ask you to confirm the deletion of the configuration file: Erase the startup configuration file? [confirm]
- After deleting the startup configuration file, you need to reboot the device to apply the change.
- The system will ask for confirmation again before rebooting: System configuration has been modified. Save? [yes/no]: no Proceed with reload? [confirm]
- Verify: After the device reboots, you can check the current configuration again with the show startup-config command to confirm that the startup configuration file has been deleted and no longer exists.
Deleting the startup configuration file is an important step in device management, helping to ensure that the device can be re-configured from scratch if necessary, or to troubleshoot problems related to the old configuration.
Benefits of WiFi router configuration

Configuring a WiFi router not only ensures the network operates stably but also brings many outstanding benefits that help optimize the user experience. Below are the detailed benefits of configuring a WiFi router.
- Enhance network security: Configuring a WiFi router allows users to set up security measures to protect the network from cyber attacks. You can:
- Enable WPA3 or WPA2 encryption to ensure that transmitted data is protected.
- Set a strong password and change it periodically to prevent unauthorized access.
- Enable a Firewall and MAC address filtering to control connected devices.
- Manage bandwidth effectively: Modern WiFi routers often support bandwidth management (QoS – Quality of Service), which allows prioritizing important applications or devices. For example:
- Prioritize bandwidth for work or online learning devices.
- Reduce latency for gaming devices or high-quality video streaming.
- Limit bandwidth for non-essential devices to optimize the overall network.
- Set up a Guest Network: Configuring a guest network on a WiFi router helps to completely separate guest devices from the internal network of a family or business. This ensures:
- Increased security by not sharing the main network password.
- Easy to limit access rights and bandwidth for the guest network.
- Customize WiFi range and coverage: Configuring a WiFi router allows users to customize the channel and frequency band (2.4GHz or 5GHz) to enhance performance and reduce signal interference. In addition, you can:
- Adjust the transmission power to suit the area that needs coverage.
- Use the Mesh WiFi feature if the router supports it, to seamlessly expand coverage.
- Monitor and control connected devices: A WiFi router provides device management tools such as:
- Viewing a list of devices currently connected to the network.
- Blocking or restricting access for unknown devices.
- Setting WiFi usage time limits for children’s devices.
To make the most of these features, users should regularly check and adjust the settings to suit their usage needs. A well-configured router not only ensures a smooth internet experience but also contributes to improving the efficiency of work, entertainment, and learning.
Troubleshooting the router

The router plays a crucial role in connecting devices to the internet. However, during use, many issues can occur that disrupt the network. Understanding and applying methods to troubleshoot the router not only helps restore the connection quickly but also ensures the network system operates stably and efficiently.
Check the Cisco router configuration connection
Checking the connection and configuration of a Cisco router involves several important steps. Users need to log into the router’s management interface through the command-line interface (CLI) or graphical user interface (GUI). Basic commands such as `ping`, `show ip route`, and `show running-config` can be used to check the connection status and current configuration. In addition, parameters such as the IP address, subnet mask, and gateway need to be checked for accuracy. If a problem is detected, the configuration needs to be corrected or the IT department should be contacted for support.
Debug command
The debug command allows for the display of detailed information about data packets, protocols, and processes running on the router. For example, the `debug ip packet` command will display information about IP packets being processed, while `debug interface` provides details about the status of the interfaces. However, the use of the debug command should be done with caution, as it can overload the system if used on a large network. To minimize risks, administrators should use this command in a test environment or limit the scope of monitoring with specific parameters.
Hardware and physical connections
Checking hardware and physical connections includes steps such as inspecting network cables, power supplies, and connection ports. First, it is necessary to ensure that the cables are not damaged, broken, or loose. The connection ports on the router and switch also need to be cleaned and checked to ensure they are not oxidized or dirty. In addition, check peripheral devices such as modems, switches, and access points to ensure they are functioning properly. Regular inspection of these connections will help to minimize unwanted incidents and improve network performance.
Beyond control
Incidents that are beyond control often relate to factors such as transmission problems from the internet service provider (ISP), international fiber optic cable breaks, or weather issues affecting the network infrastructure. In these cases, troubleshooting requires coordination with the ISP or relevant parties. Users should monitor announcements from the ISP and record the time of the incident to report when necessary. At the same time, developing a contingency plan such as using an alternative transmission line or backup network solutions will help minimize the impact of these beyond-control incidents.
Genfarmer – Pioneer in Providing Specialized Proxy Routers and MiniPCs

In the digital age, a stable and powerful internet connection is the backbone of all activities, from business operations to personal entertainment. However, for the MMO community, digital marketing experts, and businesses operating automation systems like phone farms, a standard router is not enough. Understanding these specific challenges, Genfarmer is not just a distributor of network equipment, but a pioneer in researching and developing specialized hardware solutions. We are proud to introduce our exclusive product ecosystem, designed to optimize performance, ensure stability, and provide absolute security for your system.
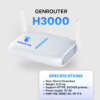
GenRouter: A Breakthrough Proxy Router Solution for Phone Farms and Multi-Account Management
Completely different from consumer routers, GenRouter is a product line specifically designed for tasks requiring the management of multiple connection streams and IP addresses simultaneously. This is the ideal device for box phone farm systems, raising large numbers of accounts, or executing complex seeding campaigns.

- Superior performance: GenRouter is equipped with powerful hardware, capable of handling hundreds of connections simultaneously without experiencing lag, stuttering, or network loss, ensuring your system operates 24/7.
- Smart Proxy Management: Integrated with advanced technologies, GenRouter allows you to easily configure, manage, and rotate proxies, helping accounts operate naturally and minimizing the risk of being banned or flagged as unusual.
- Optimized for MMO: From game farming, coin mining, airdrops to running multi-platform advertising, GenRouter provides a solid network foundation, helping you maximize profits and work efficiency.
MiniPC: The Powerful and Flexible Processing Heart
In addition to GenRouter, Genfarmer’s MiniPC is a comprehensive solution, combining the power of a high-performance computer in a compact design. The MiniPC is not just a network device, but the control center for your entire automation system.

- Powerful configuration: Optimized to run management software, automation scripts, and resource-intensive applications, the MiniPC ensures all tasks are executed smoothly and efficiently.
- Energy & space saving: With its compact size, the MiniPC helps you save installation space and consumes much less power than a traditional PC, optimizing long-term operating costs.
- Versatile and flexible: The MiniPC can act as a high-performance router, a phone farm control server, or a centralized network management device, flexibly meeting all scales and usage needs.
Why Choose Hardware Solutions from Genfarmer?
Genfarmer’s core difference lies in our deep understanding of customer needs. We don’t sell mass-market products; we provide “tailor-made” solutions for specific problems.
- Proven quality: Products like GenRouter and MiniPC undergo rigorous testing for performance and stability before reaching customers, ensuring superior quality and durability.
- In-depth technical support: Our team of experts not only understands hardware but also has practical experience in the MMO and automation fields. We are ready to advise, guide installation, and troubleshoot any issues so you can fully harness the power of the device.
- Synchronized ecosystem: GenRouter and MiniPC work perfectly with other products in the Genfarmer ecosystem, such as Box Phone Farm and the automation platform, creating a comprehensive, powerful, and easy-to-manage solution.
Conclusion
We hope this guide has made you more confident in setting up and managing your network. If you have any questions or need further assistance, do not hesitate to contact us for detailed advice. We wish you success in implementing an effective network system with Cisco router configuration!
With the motto “Technology Leads the Way – Optimal Efficiency”, Genfarmer is committed to putting the interests and success of our customers first. We don’t just sell a device; we accompany you on the path to conquering your goals in the digital world. Choosing Genfarmer’s GenRouter and MiniPC is an investment in the stability, performance, and sustainable future of your system.