In network administration, understanding show commands in Cisco routers is crucial for monitoring and ensuring the stable operation of the device. These commands provide detailed information about configuration, interface status, routing tables, protocols, and many other aspects of the system. Let’s join Genfarmer to explore a comprehensive list of common show commands and how to use them most effectively in this article!
Comprehensive Guide to Show Commands in Cisco Routers
The Cisco IOS (Internetwork Operating System) is a critical control software in Cisco’s network devices, including routers and switches. Understanding and proficiently using the commands in Cisco IOS is an essential skill for network administrators. In this article, we will delve into a comprehensive explanation of show commands, configuration commands, and privileged commands, along with guidance on accessing different working modes on a Cisco device.
List of Show Commands in Cisco Routers
Show commands in a Cisco Router are a powerful and indispensable tool for network administration and monitoring. These commands allow administrators to view detailed information about the device’s status, system configuration, routing information, network interfaces, and many other important functions. Below are some typical command groups that will be presented:
- Basic show commands: Display general information about the Router, IOS version, and system status.
- show version
- show running-config
- show startup-config
- Interface check commands: Display the status and detailed information about network interfaces.
- show ip interface brief
- show interfaces
- show ip interface
- Routing and protocol commands: Display the routing table and the status of routing protocols.
- show ip route
- show ip ospf neighbor
- show ip bgp summary
- Security and NAT check commands: Monitor security status and Network Address Translation (NAT).
- show access-lists
- show ip nat translations
- show ip nat statistics
- Performance check commands: Display information about system resources, CPU, and data traffic.
- show processes cpu
- show memory
- show ip traffic
- Log and event check commands: Display the history of events and system logs.
- show logging
- show clock
Effectively using show commands in a Cisco Router will help you easily control, monitor, and optimize network operations. Refer to the detailed list above and apply it flexibly in your practical work to become a professional network administrator.
Basic Cisco IOS Commands
To master Cisco IOS, mastering basic commands is essential as they form the foundation for all configuration and troubleshooting tasks. Basic Cisco IOS commands include many groups, serving different purposes such as checking device status, managing configuration, monitoring interfaces, and system security. Below is a detailed list of the main command groups:
- System information check commands: These commands help display an overview of the device and system status:
- show version: Displays information about the IOS version, uptime, and hardware resources.
- show running-config: Views the current configuration running on the device.
- show startup-config: Displays the configuration stored in NVRAM (which will be loaded when the device boots).
- show interfaces: Provides detailed information about network interfaces, including status and activity statistics.
- show ip interface brief: Displays a summary list of interfaces and their IP status.
- Basic configuration commands: These commands are used to configure the device and adjust necessary parameters:
- configure terminal: Enters Global Configuration Mode.
- interface [interface-id]: Accesses the configuration mode of a specific interface.
- ip address [IP] [subnet-mask]: Assigns an IP address and subnet mask to an interface.
- no shutdown: Activates an interface (removes the shutdown state).
- hostname [name]: Sets the device name.
- enable secret [password]: Configures a password to access Privileged Mode.
- Network monitoring and testing commands:
- ping [IP]: Sends packets to test connectivity to an IP address.
- traceroute [IP]: Checks the path of packets from the device to the destination.
- show ip route: Displays the Router’s routing table.
- show cdp neighbors: Checks for neighboring devices directly connected via Cisco Discovery Protocol (CDP).
- show mac address-table: Displays the MAC address table on a Switch.
- Configuration backup and restore commands:
- copy running-config startup-config: Saves the current configuration to NVRAM to persist after a reboot.
- copy startup-config running-config: Loads the stored configuration into the current configuration.
- erase startup-config: Deletes the stored configuration in NVRAM.
- Basic security commands:
- enable secret [password]: Creates an encrypted password to protect privileged mode.
- line vty 0 4: Configures remote access rights via Telnet or SSH.
- password [password]: Sets a password for an access session.
- service password-encryption: Encrypts all passwords in the configuration.
- System management commands:
- reload: Reboots the device.
- write memory: Saves the current configuration to NVRAM (similar to the copy running-config startup-config command).
- show clock: Displays the system time.
- logging [IP]: Sends system logs to a syslog server.
Mastering basic Cisco IOS commands not only helps you get acquainted with the working environment of Cisco devices but is also the first step to becoming a professional network administrator. Practice regularly and delve deeper into advanced command groups to optimize your ability to manage and operate your network system.
Methods of Accessing Modes in Cisco

Each mode has different access rights and functions, allowing administrators to perform configuration, monitoring, and troubleshooting tasks on network devices. To work effectively with Cisco, it is essential to understand the modes and how to access each one.
- User EXEC Mode: User EXEC Mode is the default mode when an administrator connects to the device. This mode allows you to perform some basic monitoring and testing commands but does not allow configuration changes. All operations in this mode are limited to ensure security.
- Access Method: To enter User EXEC Mode, simply connect to the device, and you will be placed in this mode immediately. The command prompt will display Router> or Switch>, depending on the device type.
- Basic commands in this mode:
- show version: Displays information about the IOS version and hardware.
- ping [IP]: Tests network connectivity.
- traceroute [IP]: Checks the path of a packet.
- Privileged EXEC Mode: Privileged EXEC Mode is also known as Enable Mode. This is a higher-level access mode that allows administrators to execute more detailed monitoring commands and make configuration changes. In this mode, you can access more powerful commands and check system information such as routing tables, interface status, and many other features.
- Access Method: To enter Privileged EXEC Mode, simply type the `enable` command from User EXEC mode. You will then be prompted for a password if one is set. The prompt will change to Router# or Switch#.
- Basic commands in this mode:
- show running-config: Displays the current configuration.
- show ip route: Displays the routing table.
- show interfaces: Displays detailed information about network interfaces.
- Global Configuration Mode: Global Configuration Mode allows administrators to configure general parameters for the device. Here, you can change configurations such as the hostname, network interfaces, IP addresses, and other network settings.
- Access Method: To enter Global Configuration Mode, you must be in Privileged EXEC Mode and type the `configure terminal` command. After entering this command, you will switch to Global Configuration Mode, with the prompt Router(config)# or Switch(config)#.
- Basic commands in this mode:
- hostname [name]: Sets the device name.
- interface [interface-id]: Configures specific network interfaces.
- ip address [IP] [subnet-mask]: Configures the IP address for an interface.
- Interface Configuration Mode: Interface Configuration Mode allows you to configure individual network interfaces of the device, including changing IP addresses, configuring speed, interface status, and other settings.
- Access Method: To enter Interface Configuration Mode, you need to be in Global Configuration Mode and type the `interface [interface-id]` command (e.g., interface GigabitEthernet0/1). The prompt will change to Router(config-if)#.
- Basic commands in this mode:
- ip address [IP] [subnet-mask]: Sets the IP address for the interface.
- no shutdown: Activates the interface.
- description [text]: Adds a description to the interface.
- Line Configuration Mode: Line Configuration Mode is used to configure settings for vty (Virtual Terminal) and console connections, including configuring passwords, access rights, and other security settings.
- Access Method: To enter Line Configuration Mode, you need to be in Global Configuration Mode and type the `line vty 0 4` command (to configure remote connections) or `line console 0` (to configure the console port). The prompt will change to Router(config-line)#.
- Basic commands in this mode:
- password [password]: Sets a password for the connection.
- login: Activates the password requirement for login.
- exec-timeout [minutes] [seconds]: Configures the timeout for the connection.
Understanding the different modes in Cisco and how to access each one is a fundamental foundation for network administrators to configure, monitor, and troubleshoot effectively. Each mode has distinct functions and access rights, which helps to secure and optimize the operation of the network system.
Cisco Switch Configuration Commands

A Cisco Switch is an important network device in building a LAN, helping to connect computers and network devices within the same subnet. To optimize the operation of a Cisco Switch, network administrators need to know and use basic and advanced configuration commands. These commands not only help configure basic functions but also manage performance, security, and advanced features of the Switch.
- hostname [name]: This command is used to set the name for the Switch. The device name helps administrators easily identify devices in the network.
- enable secret [password]: Sets a password to protect the Privileged EXEC mode. This password helps secure access to the Switch’s high-level administrative commands.
- banner motd #[message]#: Configures a message for users upon logging into the Switch. This command helps send warning messages or important information to users accessing the device.
- interface [interface-id]: This command enters the configuration mode for a specific port.
- switchport mode access: Configures the port as an Access port, which connects to only a single VLAN.
- switchport access vlan [VLAN-id]: Assigns the port to a specific VLAN.
- shutdown: Shuts down a specific port. If you don’t want to use a port, you can turn it off.
- no shutdown: Reactivates a port that has been shut down.
- vlan [VLAN-id]: Creates a new VLAN. This command is used to create logical VLANs on the Switch.
- name [VLAN-name]: Sets a name for the VLAN. This command makes VLAN management easier.
- interface vlan [VLAN-id]: Configures the VLAN interface on the Switch for communication between
- ip address [IP-address] [subnet-mask]: Assigns an IP address to the VLAN interface, helping the Switch communicate with other devices in the network.
- mac-address-table static [MAC-address] vlan [VLAN-id] interface [interface-id]: Assigns a static MAC address to a Switch port, preventing dynamic changes to the MAC address table.
- spanning-tree vlan [VLAN-id] priority [priority-value]: Adjusts the Switch’s priority in the Spanning Tree Protocol (STP) to manage network loops and ensure stable connectivity.
- port-security: Enables the port security feature, limiting the number of devices that can connect to each port.
- port-security maximum [max-ports]: Sets the limit on the number of devices that can connect to a port.
Mastering the configuration commands on a Cisco Switch helps you optimize and secure your network system. These commands support the management of VLANs, interfaces, security, and QoS, which helps increase the performance and stability of your network system. Practice and apply these commands in your daily network administration work to improve the operation and security of your network system.
Privilege Commands and Show Commands on a Router

Privileged commands allow administrators to perform device management operations, while show commands help check and review information about the system, configuration, and status of the network device. Below are the privileged commands and show commands on a Cisco Router, providing the necessary knowledge to use them in network administration.
- Privileged Commands: Privileged commands in Cisco IOS allow administrators to perform advanced system management tasks, such as changing configurations, accessing system monitoring commands, and making significant changes to the Router’s operation.
- enable: This command is used to switch from User EXEC mode to Privileged EXEC mode. In this mode, administrators can perform configuration and system monitoring tasks.
- configure terminal: This command is used to enter Global Configuration Mode, where administrators can make global configuration changes to the Router, such as configuring interfaces, VLANs, and other parameters.
- reload: This command is used to restart the Router. When the Router is restarted, it will reload the configuration and all system parameters from memory.
- write memory: This command is used to save the current configuration to non-volatile memory (NVRAM), ensuring that the configuration will be reloaded when the Router restarts.
- show running-config: This command displays the current configuration running on the Router. This is an extremely important command for administrators to check the active settings.
- clear: This command allows administrators to clear tables, buffers, or temporary information, such as clearing the routing table, MAC table, or assigned IP addresses.
- Show Commands on a Router: Show commands on a Cisco Router help administrators check and monitor information about system status, configuration, network connections, and the Router’s activities. This is a powerful tool for finding information and troubleshooting in a network system.
- show version: This command displays detailed information about the IOS version, hardware, memory, and the time the Router has been running since the last reboot.
- show ip route: This command displays the Router’s routing table, allowing you to check the network routes the Router is using to route traffic.
- show interfaces: This command provides detailed information about the status of the Router’s network interfaces, including operational status, bandwidth, errors, and other interface-related parameters.
- show running-config: This command displays the current configuration running on the Router.
- show ip interface brief: This command provides an overview of all network interfaces on the Router, including their status and assigned IP addresses.
- show arp: This command displays the Router’s ARP table, allowing you to check the IP addresses and MAC addresses that have been mapped on the Router.
- show cdp neighbors: This command displays information about neighboring devices connected to the Router via Cisco Discovery Protocol (CDP).
- show clock: This command displays the Router’s system time, which is very useful when you need to check the system clock or time-related issues.
Privileged commands help administrators perform advanced configuration and system management tasks, while show commands provide deep insight into the device’s status and operation. Mastering and effectively using these commands is a crucial factor in daily network administration, helping to ensure the system operates stably and efficiently.
Copy Commands on a Cisco Router
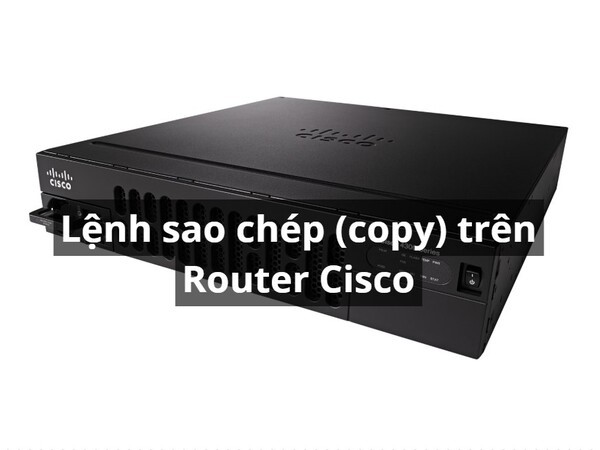
The copy command in Cisco IOS is used to copy configuration files, IOS files, and many other types of files between different locations on the Router. Understanding and correctly using the copy command helps administrators to backup, restore, and transfer configurations easily.
- Basic copy command: The copy command in Cisco IOS allows copying files from a source to a destination. The basic syntax of this command is as follows: copy [source] [destination]
- Router# copy running-config startup-config: This command copies the current configuration (running-config) from RAM to NVRAM, saving the configuration so that the Router can restart with it.
- Router# copy startup-config running-config: This command will reload the configuration stored in NVRAM into RAM, applying the saved configuration changes.
- Router# copy tftp: flash: After entering the command, you will be prompted to enter the IP address of the TFTP server and the name of the IOS file you want to copy. This action will download the IOS file from the TFTP server to the Router’s Flash memory.
- Router# copy flash: tftp: After entering the command, you will be prompted to enter the IP address of the TFTP server and the name of the file you want to copy.
- Router# copy running-config tftp: This command copies the configuration file (running-config or startup-config) to a TFTP server, which helps in backing up the Router’s configuration.
- Router# copy ftp: flash: Similar to TFTP, Cisco Routers also support copying files from an FTP server to the Router’s Flash memory.
Proficiently using copy commands not only helps secure data but also supports the maintenance and recovery of the network system. Perform regular backups and double-check copy operations to ensure the stability and security of the system.
Debug Commands on a Cisco Router
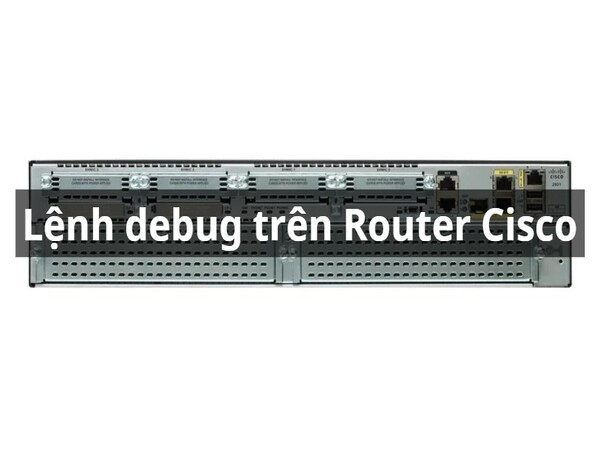
The debug command on a Cisco router is a powerful tool used to monitor and troubleshoot network issues. By displaying real-time information about the device’s activity, debug commands allow administrators to identify and resolve problems related to configuration, performance, and network connectivity. However, using the debug command should be done with caution as it can affect the router’s performance, especially in a production environment.
- Basic Syntax: The debug command usually has the following syntax:
- debug ip packet: Displays information about sent and received IP packets.
- debug arp: Displays the activity of the ARP protocol.
- debug ppp negotiation: Monitors the PPP negotiation process on an interface.
- Debug routing protocols:
- debug ip ospf events: Used to check OSPF events such as neighbor establishment or router state changes.
- debug eigrp packets: Displays detailed information about sent and received EIGRP packets.
- Debug Layer 2 protocols:
- debug arp: Checks ARP requests and responses.
- debug ppp negotiation: Helps monitor the negotiation process of the PPP protocol on links.
- Debug connections and interfaces:
- debug interface: Displays the status of a network interface.
- debug ip tcp transactions: Helps check TCP transactions on the router.
- Stopping debug: Running a debug command continuously can cause high load on the router’s CPU. Therefore, after completing the check, you need to stop the debug using the command: undebug all or u all.
The debug command is an indispensable tool for network administrators. However, using it correctly and appropriately will help you harness its power without affecting network operations.
Conclusion
Proficiently using show commands in a Cisco router is an essential skill that helps you monitor and maintain the stable operation of your network system. Hopefully, this article has provided you with useful information to apply effectively in your practical work. Don’t hesitate to practice and explore more to master your network system!


